Yoga is an ancient practice that originated over 5,000 years ago in India. Several asanas (postures), and pranayamas (breathing exercises) comprise traditional yoga. These asanas and pranayamas can help a person reclaim control of their own body and mind through regular practice. In our earlier blog posts, we have discussed whether yoga can help cure stuttering and how mindfulness can be helpful for anyone looking to overcome or manage their stutters. In this post, we will discuss specific yoga exercises that can help people who stutter.
Several forms of yoga are practiced in India and elsewhere in the world today. You can master different asanas or pranayamas from YouTube easily. Daily practice of yoga can reduce anxiety, symptoms of depression, and stress. It can also potentially improve one's fluency.
Yoga Is The Ultimate Anxiety And Stress Buster
Yoga can enhance a person's posture, muscle strength, and breathing control. According to Ristuccia and Ristuccia, 2010, asanas and pranayamas can positively influence the factors that contribute to speech fluency.
Anxiety and stress can affect the functions of the brain’s left hemisphere. The left hemisphere is also responsible for speech processing and production in humans. Therefore, dedicating some time to practice yoga regularly can improve a person’s speech and language production.
Yoga Increases Muscle Coordination and Control
Yoga aims to increase a person's coordination between their musculature and respiration through different postures and breathing exercises. It is one of the few exercises that use diaphragmatic breathing (costal breathing), which is an integral part of any fluency shaping method.
According to Gatzonis and Fabus, yoga can combine diaphragmatic breathing training with muscle control to improve a person’s speech coordination.
At the same time, yoga focuses on mindfulness and meditation. Pranayama teaches different breathing techniques to calm one’s thoughts. It can increase the practitioner’s awareness of their breathing.
Sadly, there are no studies that exclusively review the use of specific and structured breathing techniques to reduce a person's stutter. However, several studies show specific pranayamas can decrease a person's anxiety, hypertension, and stress. That can lead to effectively smoother speech with fewer interruptions.
There are hundreds of yoga postures and breathing techniques. Not all of them help in reducing stuttering. Here are 11 yoga poses and pranayamas that can help increase your fluency slowly but steadily –
1. Sahaj Shankh Mudra (Easy Conch Shell Pose)
It is one of the easiest mudras or hand poses you can master for smooth breathing. The result should resemble the folds of a conch.
How to Practice Sahaj Shankh Mudra?
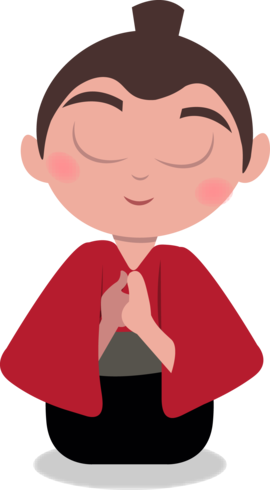
- First, sit straight with your hips on your heels (Vajrasana) and regulate your breathing. Your breathing should be deep and even.
- Raise both your arms evenly, bend your elbows and bring your arms closer to your chest.
- Grasp the left thumb with all four fingers of your right hand.
- Touch the right thumb to the left middle finger.
The literature on yoga suggests that this hand posture is beneficial for throat muscles, neck muscles, and all disorders related to the throat. Remember to focus on your breathing to gain the maximum benefit of the posture.

2. Brahma Mudra
The Brahma Mudra invigorates the heart, throat, and crown chakras. It is a power-filled hastha-mudra that is beneficial for the throat and all speech-related disorders.
How To Practice Brahma Mudra to Manage Speech-Related Disorders?
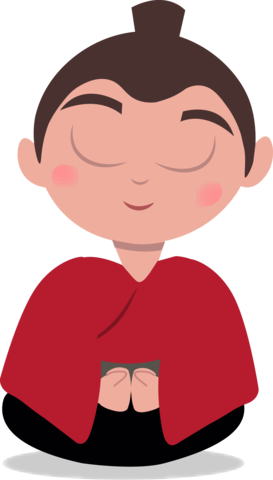
- Begin by sitting cross-legged. Straighten your back. Put your hands on the knees.
- Make fists using both hands, with both your thumbs touching the base of your little fingers on each hand.
- Keep your fists facing upwards and touch the right knuckles to your left.
- Maintain the hand pose and move the touching fists towards your navel while inhaling.
- While exhaling, press the fists against your abdomen and feel the air leave your lungs and your tummy deflate completely.
- Inhale and release your fists. Let your hands rest on your knees once again.
The Brahma Mudra can increase the strength of your articulator-muscles and give you more control over your breathing, both of which are necessary for the production of smooth speech.
3. Simhasana (Lion Pose)
Simhasana or the Lion Pose is a wonderful posture for reducing anxiety, tension, and stress. It relaxes the body and mind. The forceful exhalation with voluntary muscle contraction during Simhasana is what releases the tension from the body and mind.
Steps to Practice the Lion Pose
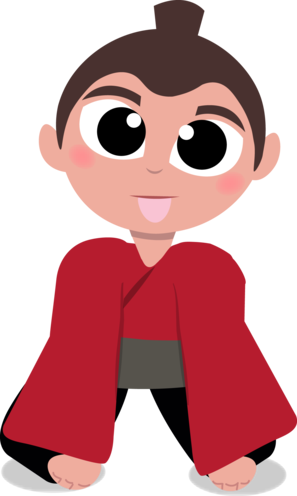
Kneel on your yoga mat (Vajrasana) with your hands placed on your knees. Make sure your spine is straight.
- Take at least two deep breaths (diaphragmatic) before you assume the pose.
- Press your palms on your knees. Keep your fingers open akin to the claws of a feline.
- Lift your hips and move your body slightly forward.
- Inhale deeply through the nose.
- Stick your tongue out and exhale forcefully by contracting your abdominal muscles as much as possible.
- Roll your eyes up and focus on the center between your eyebrows.
- Feel the force of your body leaning forward as your press your palms against your knees and the momentum of the exhalation.
- After complete exhalation, resume your relaxed posture (vajrasana).
The lion pose is a powerful asana that engages the spine, abdominal muscles, diaphragm, and all the articulators. It is excellent for reducing stuttering. You will not feel the effect in one day. However, practicing it daily for at least a month will give you the confidence and strength to speak more fluently.

4. Vrikshasana (Tree Pose)
The Tree Pose or Vrikshasana is a yoga posture that strengthens the muscles of your legs, back, hands, and neck.
It regulates breathing and aids diaphragmatic breathing practice.
Steps You Should Follow to Assume Tree Pose
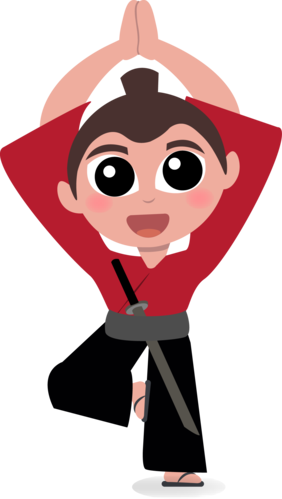
- To begin, stand straight and tall. Keep your arms by the side of your body.
- Fold your right knee and put your right foot on your left thigh.
- Keep your left leg straight.
- Take a deep breath once you find your balance. Raise your arms slowly above your head. Bring your palms together and look ahead.
- Keep your spine straight. Maintain deep breathing.
- Exhale slowly and bring your hands back to your sides.
- Release the right leg gradually and bring it back beside the left leg.
- Repeat the same posture with your left leg folded and right leg straight.
Vrikshasana can rejuvenate and re-energize you after a long day. It improves concentration and control over your articulators. Vrikshasana can reduce speech disfluency in adults slowly but steadily.
5. Trikonasana (Triangle Pose)
Trikonasana or the triangle pose is ideal for yoga practitioners of every expertise level and age.
Practicing the Triangle Pose for Reducing Speech Disfluencies
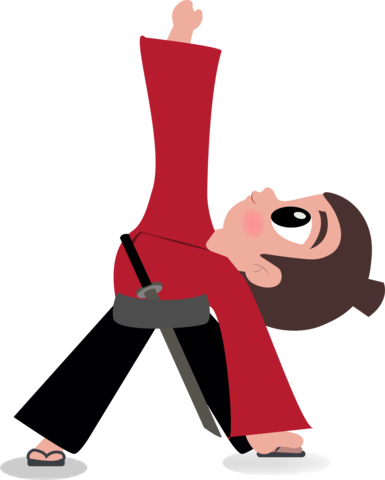
- Stand straight with hands by your side. Take one step to the side so your feet are 3.5 to 4 feet apart.
- Raise both your arms till they are parallel to the floor. Stand in front of a mirror if necessary to assume this posture.
- Align your right heel to the middle of your left foot. Balance your weight on your feet.
- Inhale and exhale deeply. Bend towards the right while keeping your knees unbent. Keep your waist straight and bring your left hand above your head. Stretch towards the ceiling, without bending your elbow.
- Turn your head to look at your left palm.
- Make sure you are only bending sideways and not towards the front or back.
- Take a few deep breaths. Inhale deeply while resuming your initial neutral position.
- Try the same pose with your left heel aligned to the center of the arch of your right foot and your right hand stretched up.
Always warm-up before attempting trikonasana. It is a posture that benefits almost the entire body. Virabhadrasana is another great posture to try and master once you have completed the trikonasana.
Yoga experts state that the triangle pose is effective in reducing speech disfluencies in adults and youngsters who practice it at least once daily.
6. Virabhadrasana (Warrior I Pose)
The Warrior Pose has 3 variations. Here, we will talk about the ‘Warrior I Pose,’ which is ideal for beginners.
How to Practice the Warrior I Pose at Home?

- Stand straight with your legs slightly apart and hands by your side.
- As you exhale, move your left foot 3.5 to 4 feet away from the right, and raise your arms beside your head.
- Your arms should be parallel to each other.
- Breathe in. Turn your right foot 90 degrees to the right and left foot 60 degrees to the right. Keep your right and left heels aligned.
- Exhale and turn your torso to the right. Keep your left heel on the floor.
- Bend your right knee and bring your shin in a position perpendicular to the floor. Try to align your right thigh with the floor.
- Stretch as you spread your palms and join them together. Tilt your head to look where your thumbs meet.
- Take a few deep breaths and return to your initial posture.
- Now, try the same with the other leg.
It stretches and strengthens the muscles of your calves, thighs, entire back, neck, and arms. The deep and controlled breathing helps in invigorating the articulators. Virabhadrasana is a holistic yogasana that targets physical and mental wellbeing.
7. Savasana (Corpse Pose)
You should end every yoga posture you practice with the Savasana or the corpse pose. It is one asana that is meant to provide utmost relaxation to every muscle in the body.
There are several variations of savasana. Here, we are discussing the simplest and most common one.
The Corpse Pose - Step By Step

- To achieve the posture, lie down straight with your eyes closed.
- Keep your hands beside your hips, stretched out, but relaxed. Keep your palms turned upwards.
- Make sure your legs are straight, but your feet are about a foot apart from each other.
- Now, exhale deeply and feel the tension leave your limbs.
- Stay for at least 2 minutes in savasana. Practice deep or diaphragmatic breathing the entire time.
- To come out of savasana begin by deepening your breaths. Then begin to wiggle your toes and fingers.
- Feel the movement in each appendage and limb.
- Stretch your arms over your head to stretch your entire body.
Savasana is a simple yet relaxing posture that completes every yoga session. Always intersperse two postures with 2 minutes of savasana. End the entire session with at least 5 minutes of savasana.
It is the best asana to release built-up stress and anxiety that can make your stuttering worse. When you don’t have time for practicing all your asanas, take out 5 minutes to practice savasana only!
8. Sukshama Vyayama
Shukshama Vyayama translates to ‘subtle exercising.’ It is not one but a set of subtle workout techniques that stimulates your entire system.
There are three main components of Shukshama Vyayama that you need to pay attention to –
- Your breathing
- A point for concentrating
- The exercise
Here’s how to do it –
- Place your hands on either side of your head and massage gently.
- Begin breathing deeply.
- Pinch your eyebrows between the index finger and thumb of each hand 5-6 times.
- Roll your eyes in the clockwise direction 10 times and the anti-clockwise direction 10 times.
- Blink by squeezing your eyes shut and opening them as wide as you can 10-15 times.
- Tug on your ears for 10 seconds.
- Hold and tug your ears in a clockwise and anticlockwise manner 10 times each.
- Massage your cheeks using your first three fingers on each hand. Go from your jawline to your chin and back.
- Now, open and close your mouth (jaws) with force 10 times.
- Begin rotating your neck. While inhaling, tilt your head back. While exhaling, tilt your head forward so your chin touches your chest.
- Rotate your head in the clockwise and anticlockwise directions 5-6 times each.
- Stretch your hands on either side in parallel to the floor. Shake them out for 2 minutes.
- Halt all movement and sit still.
Shukshama Vyayama is all about invigorating all the muscles involved in the expression. It is one of the finest exercises for those who want to practice yoga to reduce their stuttering.
9. Nadi Shodhana (Alternate Nostril Breathing)
It is a powerful yet simple tool that can have a profound impact on your nervous system, circulation, and mind.
The Alternate Nostril Breathing Yoga Exercise Step-By-Step
- First, sit comfortably with your back straight.
- Place your hands on your knees with the palms open towards the ceiling.
- Lift your right hand, place the tips of the index and middle fingers between your eyebrows. Place your ring and little finger on your left nostril and thumb on the right nostril.
- Breathe out of the left nostril only by using the thumb to press (block) your right nostril.
- Next, breathe in through the left nostril and breathe out only from the right, by blocking the left.
- Then, breathe in through the right nostril and exhale through the right.
This comprises one round of Nadi Shodhana or alternate nostril breathing exercise. Complete 10 rounds every day for maximum benefits.
Remember to breathe deeply to the fullest capacity of your lungs each time you inhale and to breathe out forcefully till your chest is empty while you exhale.
10. Bhastrika (Bellows Breaths)
Always practice Bhastrika or bellows breaths in the morning or the beginning of your day.
Do not practice this before bedtime as it may make it difficult for you to fall asleep.
How to Practice the Bellows Breaths Pose to Improve Speech Production?
- Begin by sitting straight and relaxing your shoulders.
- Take a few deep (diaphragmatic) breaths through your nose.
- Now, begin to exhale forcefully through your nose.
- Always inhale with force for one second per cycle.
- Use your diaphragm to control the air volume. Use your maximum tidal volume to breathe in and out.
For the first cycle, complete 10 breaths, take a 15-30 seconds break, and then follow it up with 20 more Bhastrika breaths. This pranayama increases lung capacity and tones the muscles involved in speech production. It relaxes and energizes the brain. It is one of the primary pranayamas you should practice to reduce the impact of stuttering in your life.
11. Ujjayi Pranayama
Ujjayi breathing or victorious breath calms your mind and silences the negative thoughts that arise in your head.
Always inhale and exhale through your nose only while performing ujjayi pranayama.
Steps On How to Practice Ujjayi Pranayama at Home
- Remember to sit up straight.
- Keep your mouth closed while breathing.
- Constrict your throat muscles so that breathing in and out makes a noise similar to snoring.
- Engage your diaphragm throughout the exercise.
- Make sure the duration of your inhalation and exhalation are equal.
You can practice Ujjayi Pranayama in the morning or at night. It releases tension. It gives you control of your throat muscles. A recent study shows that yoga breathing or pranayama can relieve symptoms of depression and anxiety disorder that often arise after decades of stuttering.
What Are The Overall Benefits Of Yoga For Those Who Stutter?
Many yoga postures and breathing exercises are beneficial for stuttering and other fluency disorders. Several of them don't act directly on the articulators but help us by boosting our concentration, confidence, and control.
Yoga can relax you, alleviate your anxiety and stress. It can improve your sleep quality and replenish your nervous system naturally.
Yoga contributes to a positive attitude in life, which is an integral part of every stuttering therapy. If you are receiving speech therapy for stuttering whether through traditional speech therapy clinics or a cutting-edge speech therapy app like Stamurai, it is a good idea to couple it with these yoga poses and breathing exercises to gain the most from your sessions. A calm state of mind will help you learn faster and remain motivated to do your daily speech exercises.


